How to Hang String Lights Outdoor

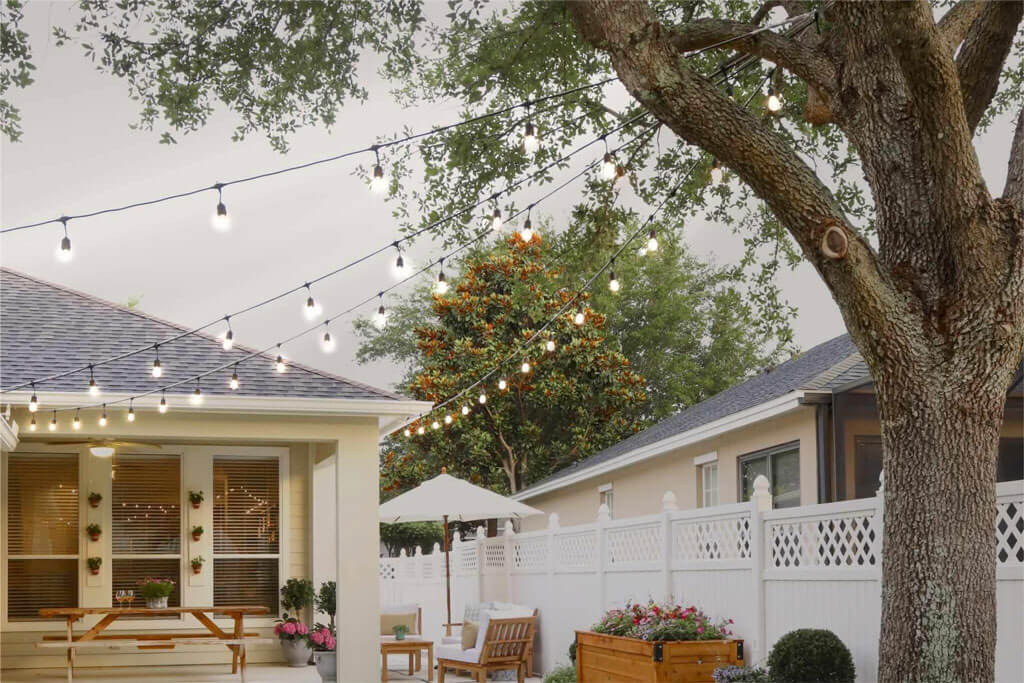
Twinkle lights make everything magical. But if you’re not careful, they can be a nightmare to install. Learn how to hang string lights outside using stainless wire for support. With these tips, you can create an outdoor oasis in no time!
METERIALS NEEDED TO HANG STRING LIGHTS
- LED outdoor string lights
- stainless steel cable, cable clamps, and eye hooks (or a kit like this)
- ladder
- hammer or drill, screw driver, and wire snips
- black zip ties
- black extension cords (optional)

LEARN HOW TO HANG OUTDOOR STRING LIGHTS
Learn how to use support cables to hang outdoor string lights over your patio or yard.
1. Make a plan
Making a plan may be definitely the slowest part of the whole project – There are four major considerations:
- Make sure you have power source (an electrical outlet plug or an extension cord) at the start to plug in your light cord.
- Check your lights for the recommended number of strands that can be connected together safely. If you need more strands than that, you will need to have another plug for some of the strands.
- Design the look you want for your yard or covered patio. The lights can be strung in neat, straight lines, zigzag across the middle, straight around the perimeter, centralized around a point like a circus tent, or randomly for a whimsical look.
- Find natural supports or sturdy places to attach the wires at least 9′ off the ground to allow for a bit of sag and for the lights to hang down. Healthy trees, a solid spot on your house or patio, a gazebo roof, or a post secured by cement will work. It needs to be able to hold an eye hook screw securely. Once you have decided these details, measure the space, then order your lights and cable hanging materials.
2. Attach eye hooks perpendicular to the run of the cable
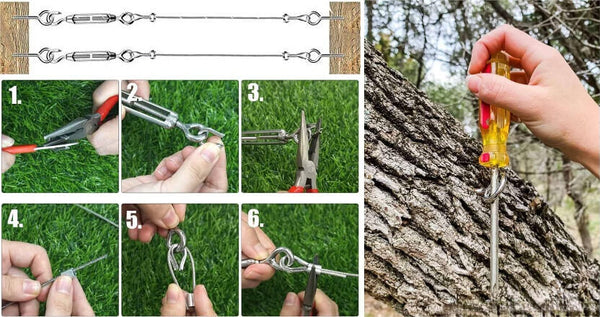
There will be tension on the cable, obviously, so it is important that the eye hooks be installed securely. At least 9′ off the ground, choose a position that will allow the eye hook to stick out perpendicular to the direction the cable will run. This will keep the pressure of the cable from trying to pull the screw hooks straight out of the tree/wooden.
Use a hammer to tap the end of your eye hook into the tree (or pre-drill if you prefer). Once it is secure, begin screwing it in. You may have to repeat the tapping and screwing a few times as it makes its way through layers of bark. Eventually, though, it will catch and you can screw it in securely.
To tighten the screw, using a screwdriver through the eye for leverage.

3. Run stainless steel cable
Between each set of eye hooks, run stainless cable and secure using aluminum sleeves or other wire locks. Be sure to pull the cable tight before securing.
4. Lay out the lights
Laying out your light strands before you begin securing them to the cable will save you tons of time. Decide exactly how many bulbs will be secured to each cable run so that you can then attach the lights with the ladder in just one spot.
5. Secure lights with zip ties

6. Finish
Secure the end of your final strand to the last eye hook and enjoy!
String lights are a great way to add some ambiance to your home. They’re not just for Christmas and they can be used all year round! Whether you choose to light up your trees, your backyard patio, your porch, or another outdoor existing structure, hope these tips help!
Have any other questions about DIY hanging outdoor lights? Ask away! And don’t forget to share it.
TAGS:
SHARE:


